Tag Archives: count-down

Restoring Count-Down: Finished!

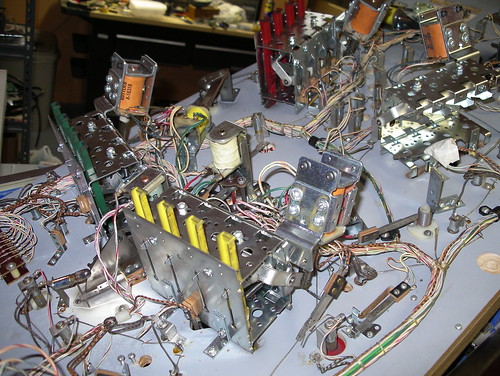
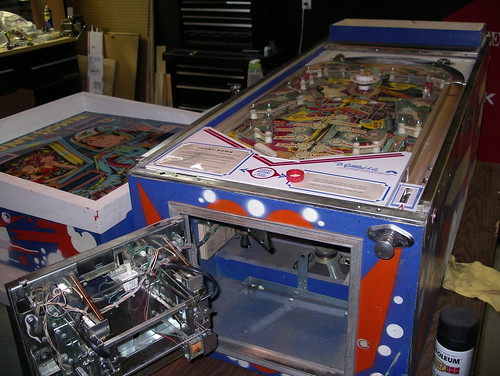
As the system that straddled the electromechanical and solid state eras, Gottlieb System 1 pinball machines were, even brand new, notorious for their electronic issues, and now that the components have aged for thirty years, the potential problems have only compounded. There are very few who’d call troubleshooting a System 1 an enjoyable experience, and some techs refuse to work on the machines entirely.

By the time I called Nick at Planet 9 Pinball, I’d rebuilt the power supply, replaced a half dozen of the transistors on the driver board, and had gotten everything up and running but the outhole kicker and a couple other troublesome bits. Unfortunately, I managed to short out the transistor on the bottom of the power supply against its bracket, setting off a minor chain reaction. This is when I called Nick.

He quickly resolved the remaining under-the-playfield issues and was able to get the machine back up and running, but while a testing low voltage issue he inadvertently discovered a bad potentiometer, shorting a handful of chips on the MPU board in the process. I replaced the bad pots, and over the course of the next week he tested and replaced MPU chips one by one until things were (mostly) back to working condition. Plans were made to source the remaining chips (for the display controllers), and Nick went on his way, vowing to never work on another System 1 game again.

[Btw, I highly recommend Planet 9, Nick’s a good guy, his rates are reasonable, and he’ll slog through the muck to get your machine up and running again.]

Knowing that the playfield mechanics were solid and that this machine would be living with me for years to come, I began to look into some of the more recent System 1 replacement boards developed by boutique outfits and hobbyists in the scene. I’d heard glowing reviews of a modern all-in-one board designed by Pascal Janin, and having just buffered my arcade project coffer with a few parts sales, I took the plunge and ordered his PI-1 X4.

Pascal Janin's PI-1 X4

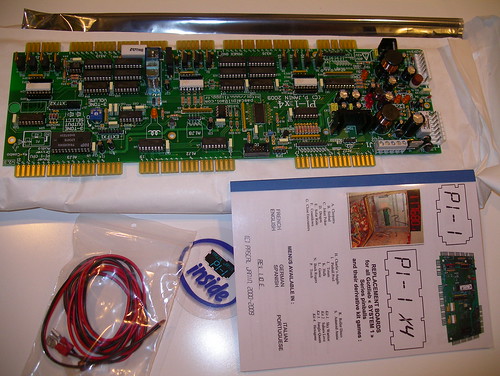
The PI-1 X4 fits into the backbox and replaces the power supply, MPU board, driver board, as well as the three-tone sound board mounted in the front of the cabinet. In addition to replicating the base game functions completely, it adds a whole mess of new features (skill shot, attract mode, free play, multiple high scores with name entry, etc), moves the stored data from battery backup to NVRAM, and corrects many of the faults of the original hardware.

Pascal’s manual was well thought out and installation took maybe 20 minutes. After thoroughly testing everything and setting the parameters via his display menu system, I gave the playfield a quick wipedown, replaced the glass, and played my first game on the fully working machine. Man, did that feel good.

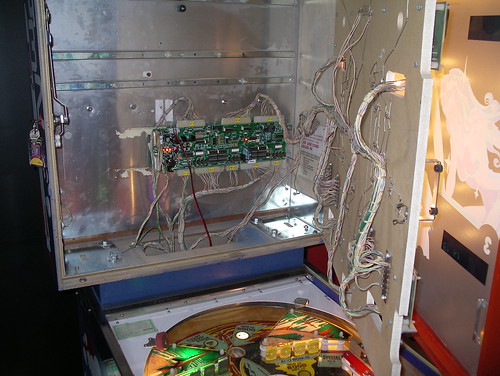
Here’s the PI-1 X4 mounted in the backbox… lots of room leftover!
 PI-1 X4 installed in Count-Down

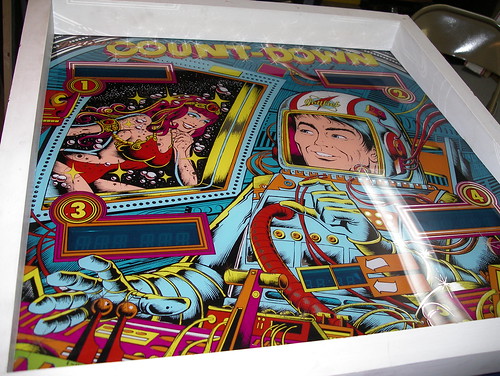
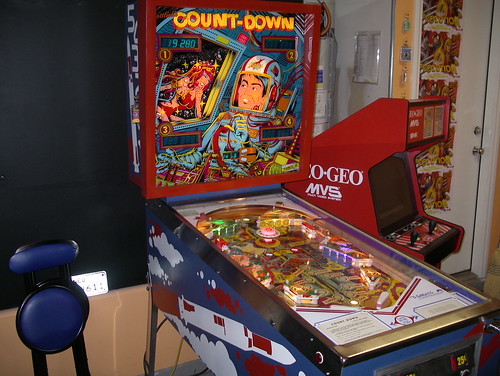
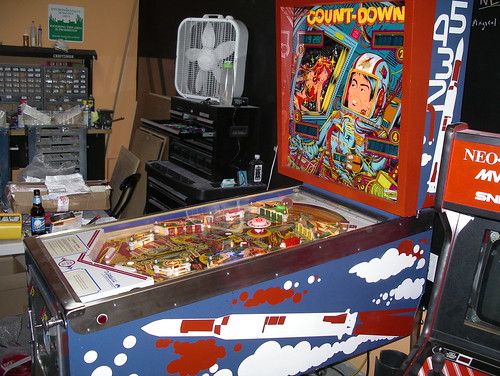
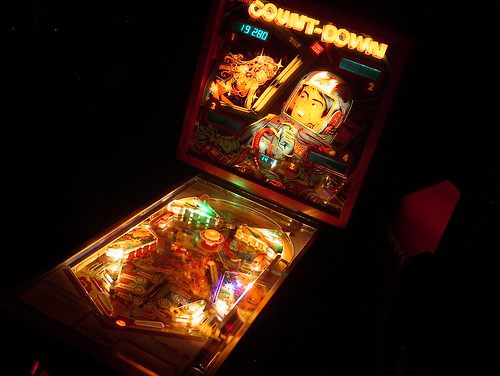
And finally, after too many hours, a lot of sweat, and a little bit of blood, here’s my finished Count-Down:

Count-Down!

More Count-Down!

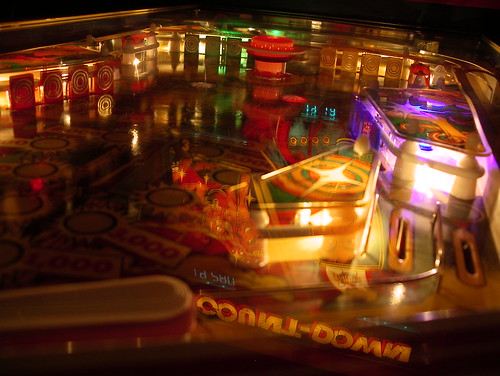
Count-Down in the dark! All new playfield lights, including colored LEDs in the inserts and behind the drop target banks:
More Count-Down, in the dark!

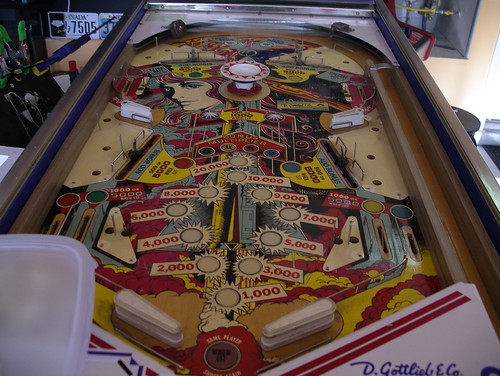
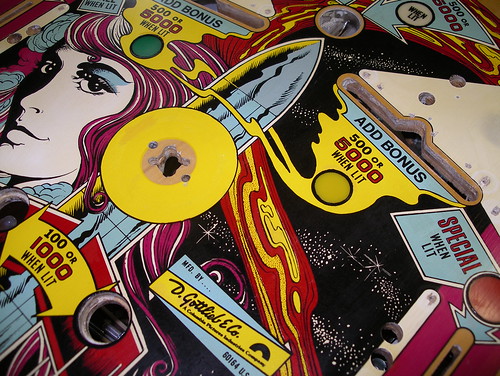
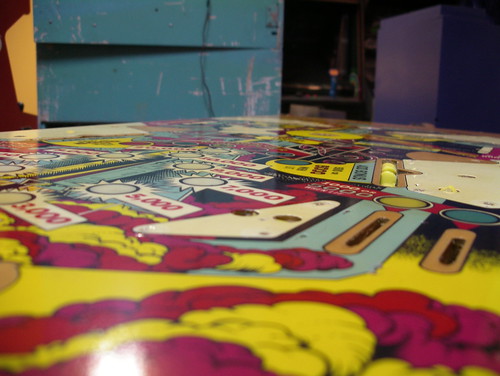
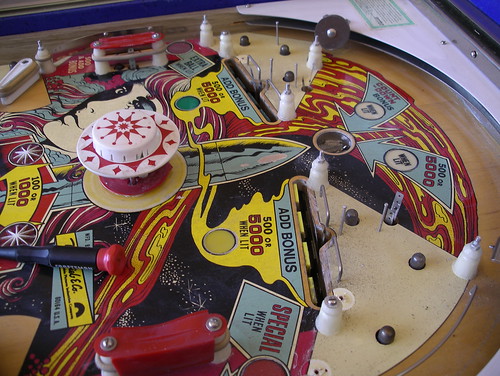
And a final gratuitous playfield closeup:
More Count-Down, in the dark!

Restoring Count-Down: the cabinet.

So here’s what I started with… a handful of erratic spraypaint additions and a repainted backbox surround.
Count-Down side
Count-Down backbox
Count-Down front

The original Count-Down stencil art is (in my opinion), the worst of all the Gottlieb System 1 games. A shame, as the playfield and backglass designs are some of the best from the era.

If you look at some of the better System 1 examples, you’ll see a much more skillful use of style and composition in the stencils. Thoughtful design, sharp and flowing edges, graphic design pieces that hold up as art on their own. Now compare those to Count-Down: rather than choosing lines carefully and pushing towards the iconic, the rocket was simply illustrated as a child would draw it (although I do like the coiling smoke of the liftoff), with cabinet front stenciling that did nothing to connect the pieces or bolster the overall theme.

So I said purists be damned, and drew up something new.

In the old days, back before the word hitchhiker became analogous to murderer, if you came across traveler with her thumb out while you were only driving a short distance, this is the gesture you’d give:
Hitchhiker gesture

That gesture said, “hey there space babe, you’re welcome to come along, but I’m not going far,” giving your prospective hiker the chance to pass and wait out for a more beneficial riding opportunity. And in space babe terms, circling the Earth in a space station would certainly be considered short distance travel.

With that in mind, I themed the stencil redesign on the NASA space program of the 1970s, with a Saturn V rocket (carrying the Skylab payload), and a font based on the agency’s then-current worm logo. At the same time, I still wanted the cabinet to be recognizably Count-Down.

Here’s the final artwork, just before sending the Illustrator files off to Rich at ThisOldGame.com for reproduction.
custom stencil

While the addition of the numbers meant that two sets of backbox stencils would have to be made (usually, stencils on one side simply mirror those on the other), I felt it was necessary to anchor the art to the game, and to help the backbox stand out as more than just a smaller version of the main cabinet design.

Here’s what I received in the mail a few weeks later:
custom stencils from thisoldgame.com
Continue reading

Restoring Count-Down: Playfield

I mention this every time I write up one of these, but I can’t stress it enough… take lots of pictures! If your memory is as unreliable as mine, reference photos will save your ass when it comes to the putting everything back together stage.

Playfield reference
Under playfield reference

Another tip: Punch all of your rails and nails into a piece of cardboard. Even better than a reference photo.
Rails and nails!

While the playfield plastics were mostly in decent shape, they were a bit warped. A hot afternoon in the sun pressed between sheets of glass (thanks Cyberball RIP!) flattened them out nicely.
Flattening plastics

First step before touchups was to clean the hell out of the playfield. Tim Arnold recommended Turtle Wax Chrome Polish, which also came in handy for the actual chrome bits later on, and I followed that with Novus2 and Magic Eraser melamine foam (with alcohol rather than water) to pull up some of the heavy ball swirls in the paint. Be careful with the melamine foam, as too much pressure can quickly chew through your playfield.

I used water based figure paints because I’m a nerd and had some on hand, but I dunno if I’d go this route again. Coverage was sometimes a pain, and I had some minor color shifting after the clearcoat application.
Touching up space and the Gottlieb logo

The above area, after touchups. The nosecone match was a bit off, but as I ended up repainting the entire cone, it looks fine assembled.
Touchups

Touchup work is very delicate and time consuming, but the end results are worth it. Maybe. I mean, I love the way the playfield turned out, and thank God for podcasts to listen to in the background, but I spent many many hours hunkered over the thing. Something I’ll treasure for the rest of my life and all that, right?
Finished touchups!

Next step was clearcoating. Clay Harrell’s pinball restoration guide was a huge help here, and I recommend referencing it if you undertake a similar project. Between that and his repair guides, you could pretty much get from beginning to end with his articles as your sole source of information.
Clear coat time

I used Varathane semi-gloss clearcoat, applied liberally with a day or two of drying time between applications. Once I had a couple coats down, I added a round of light sanding between each coat, taking care to not tear into the layer beneath. After a total of six coats, I let it cure for a couple weeks and then took a final pass with the high grit sandpaper.

The whole clearcoating process took about a month, but the actual time requirements each week were minimal. The important part is having someplace for the playfield to dry where it won’t attract dirt and contaminants.

Shiny!
That's a Sea Devil reflecting in the playfield.

Next: restenciling the cabinet.

Restoring Count-Down

I’ve been attempting to alternate project difficulty levels with the arcade restoration queue, partly for financial reasons (the pain in the ass projects also tend to be the most expensive), and partly to stagger the overall punishment thrown my way. With the relative ease of the Neo-Geo MVS and Missile Command projects, I figured it was time for a doozy.

Pinball fascinates me — not only did those guys (and as far as I can tell they were all guys) have to contend with standard aspects of game design such as gameplay, pacing, and theme, they had a slew of mechanical engineering and physics issues to deal with on top of ’em. I wanted a project pinball machine, something I could tear apart, learn a little bit about, and restore. Earlier this year, I found it: a 1979 Gottlieb Count-Down. Cosmetically rough, but complete. The game wouldn’t start (not unusual for a System 1, as I’ve learned) and had electrical and mechanical issues, but that’s part of the fun, right?

Here’s the cabinet as I began the initial cleanup and teardown.

Count-Down

Past owner touchup number one: several thick coats of latex white on the normally orange backbox. Luckily, aside from a few errant paint drops, the backglass itself was in fantastic shape.
Hey there, space babe.

Past owner touchup number two: spray can + lack of restraint =
hmm.

While the playfield wear wasn’t horrible, the insert rings, the rocket cone, and a handful of other detail areas could all use repainting. There were lots of ball swirls to work out, too.
lower playfield
upper playfield

Next up, playfield touchup.