First, a couple more Tron restoration links: Peter Hirschberg’s gallery, and another from BYOAC.
Lots of cabinet repair progress this week. While most of the woodwork is in decent shape, the back was pretty shot (lots of water runoff) and the floor had seen better days. Time to repair what I could, and replace whatever couldn’t be repaired.
The back doors are trashed, many orders worse than the rest of the cabinet. I’m guessing that the previous owners each swapped out door sets for their other Trons, leaving the worst of the lot for mine. I’ll be building new doors in a later episode.
And speaking of rebuilding new doors, I broke down and bought a Ryobi jigsaw. While I don’t loathe the thing as much as the Home Depot reviewers do, it does have some issues. The jigsaw feels rugged enough, but the actual construction could use some improvement. On first use, the laser sight was misaligned and blade angle wouldn’t stay positioned; breaking down the bottom base and aligning and tightening everything helped, but I still have problems cutting a perfect line. I figured it was my lack of skill, but with the universally bad reviews, I may end up exchanging this one for another brand.
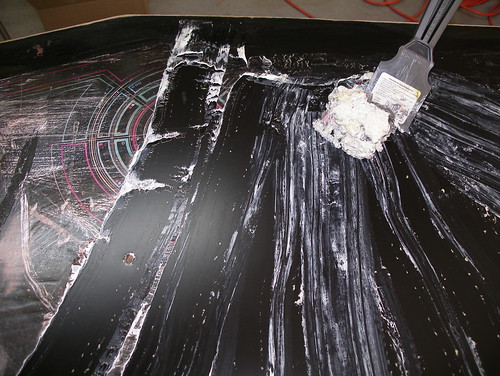
Sideart removal was just as easy as it was with the control panel. Slathered on the Citristrip, went to bed, and scraped the next morning. As you can see in the image below, the end result is something like a giant glob of chewing gum. Wiping down the cabinet with Goof Off afterward removed the final remaining bits.
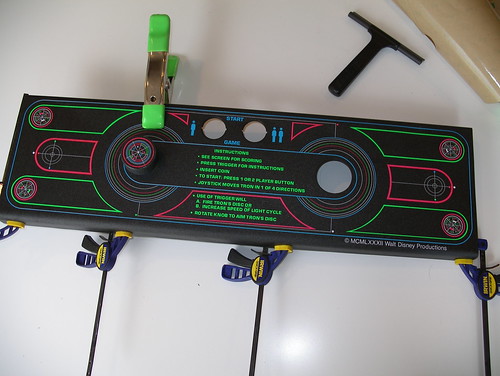
The first complete piece! I’m impressed with the Phoenix Arcade reproductions, so far the quality is top notch. I tend to be pretty obsessive about proper alignment, so I went with the wet application method just in case things went a bit off-kilter. Happened to have a window film applicator kit handy, but windex or a squirt bottle with a dash of dishsoap added will also do the trick. Wet application is what you see window tinting guys do: spray the entire surface area lightly, then apply. This let me slide the artwork around a bit to get everything lined up just right along the main control panel area, then I wiped off the front and back lips and folded the rest of the artwork over. Finally, I ran over it a few times with the squeegee and clamped the edges to keep them down until the surface area was completely dry.
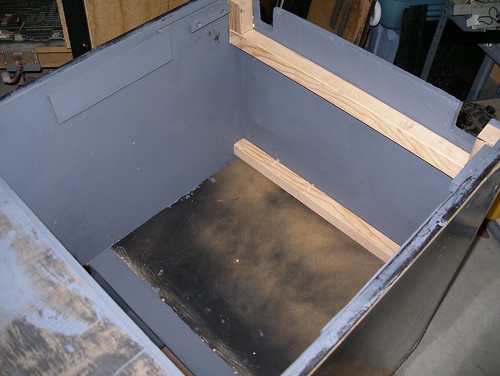
Finally, priming and bracing the interior. I decided to retain the original bottom piece, but added braces for some extra strength. Additionally, the braces will serve as risers onto which I’ll mount the power supply board, bringing it up from the floor of the cabinet.
The big Bob Roberts parts order came in:
- used Midway Service Panel
- 8 ohm 15 watt shielded 6X9 speaker x2
- Set of 4 Black steel cabinet corner protectors
- Video game leg levelers (4)
- Video game leg leveler mounting plates
- K4900 19″ color cap kit
- Tron MCR 4″ SCSI cables
- Tron/MCR Replacement Video Cable
- Tron Lithium Battery Conversion Kit
- Lock set keyed alike 641 (1)1 1/8″ & (2) 7/8″
- cable clamp assortment bag of 25 each size (100 total)
- cable clamp pan head screws 1/2in (100) black
- .084 Plug & receptacle 3 position w pins & sockets
- xcelite flushcutter
- (and bonus, they sent along a free wire stripper for lagniappe!)
Next time: sanding, and then some more sanding!