Tag Archives: tron

Refreshing the Tron lower plastic.

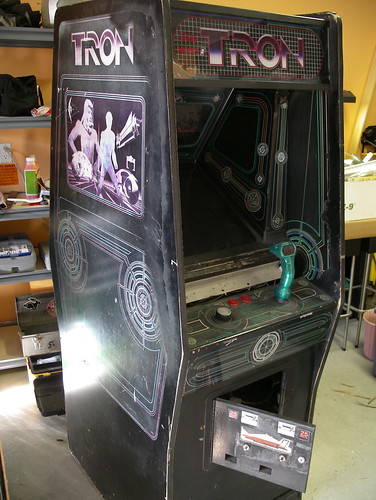
One thing that most original Tron cabinets all have in common, aside from beat up side art, are faded plastics. After years of abuse from the blacklights, the ink desaturates and the distinct colors are lost. While there are high quality acrylic reproductions available, they are costly, and I wanted to see what I could do with materials (mostly) on hand. Thanks to Jeff Rothe, I found myself with a spare lower plastic, and it was time to experiment.

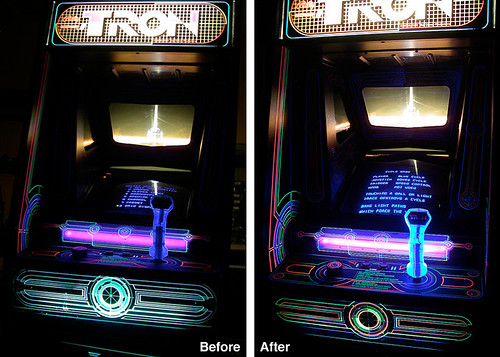
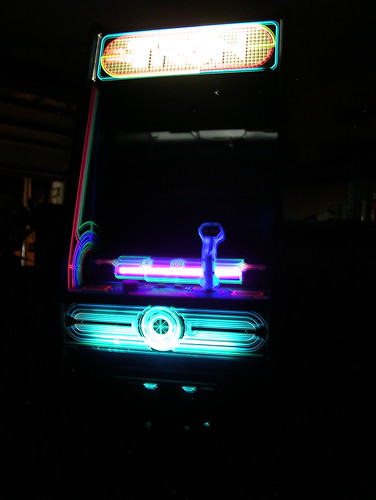
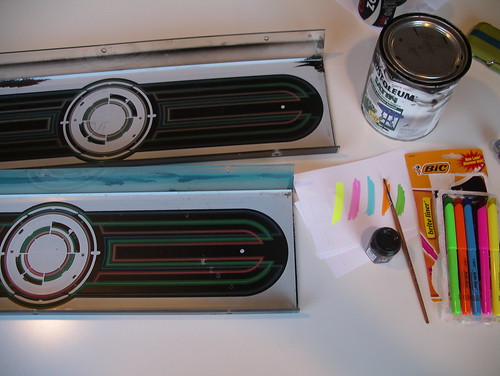
Here’s the before shot. Both lower pieces were in roughly the same condition; the original colors could be seen, but were extremely washed out when backlit. Of the highlighter colors I tested, only orange and yellow fluoresced vividly.
Tron, pre highlighter

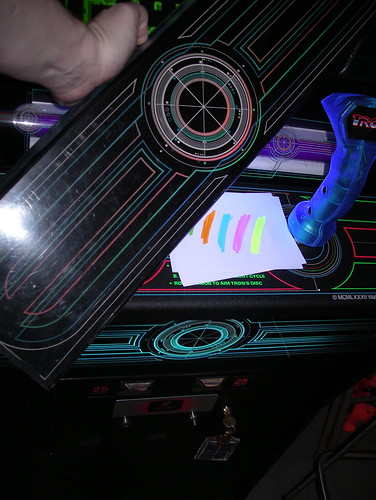
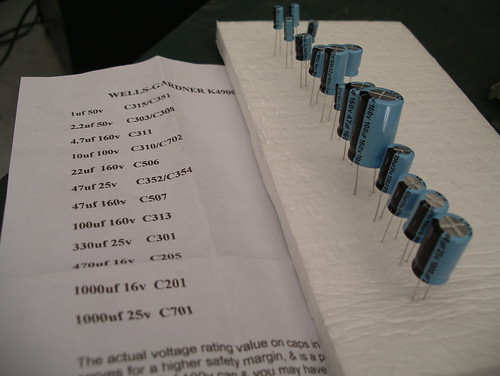
The tools. Rustoleum satin black (model paint was too thin), a tiny paint brush, and a new package of Bic brite liners.
Preparing

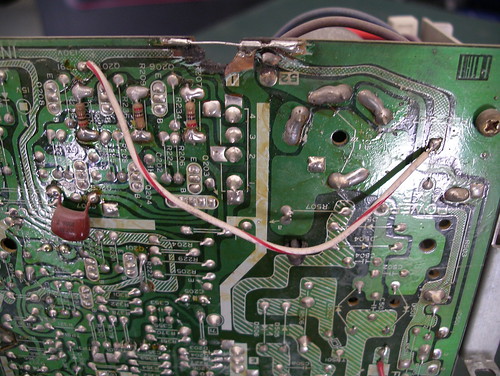
My first step was to repaint all the areas where the light wasn’t supposed to shine through. This was the part that took the most time and care, as screwing up a line would be very obvious when the whole thing was backlit.

Once that was done, I let the plastics dry for several hours while Tina and I hit the gym and ate dinner. Who knew that Thanksgiving leftovers could be turned into a delicious Vietnamese meal (it’s true!).

This would be a good place for an in-progress photo, but I forgot to take one. Sorry.

The next step was pretty much like coloring in a boring coloring book. Aside from the center area, where the design gets a bit complicated, the lines were simply a matter of laying down the right color. I used the orange highlighter for the ah, orange/red parts, yellow over the green, and the not-so-fluorescent blue over the very faded blue areas.

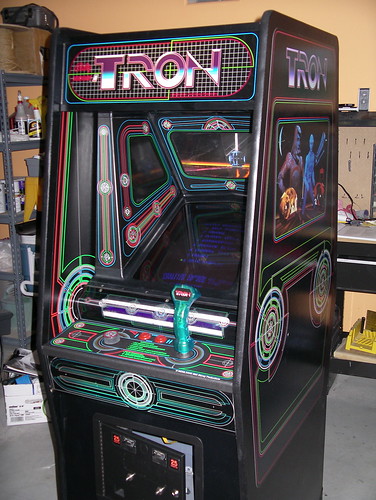
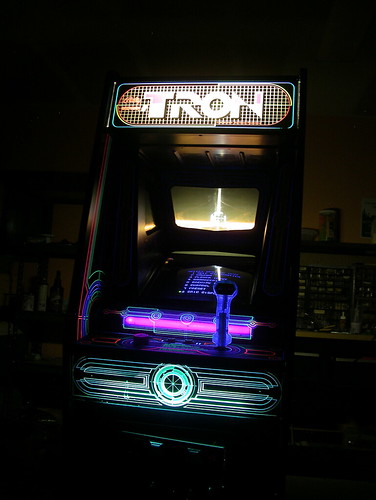
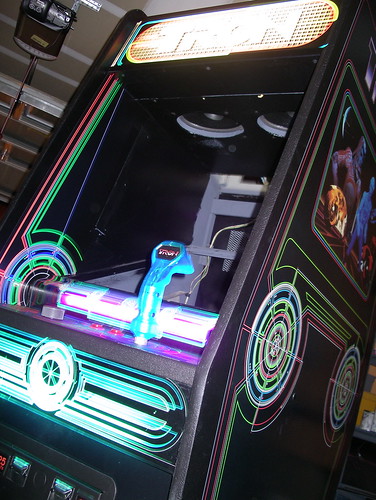
After installed the painted plastic and swapping out the white blacklight for a regular ol’ blacklight (increasing the highlighter fluorescence), here is the final result:
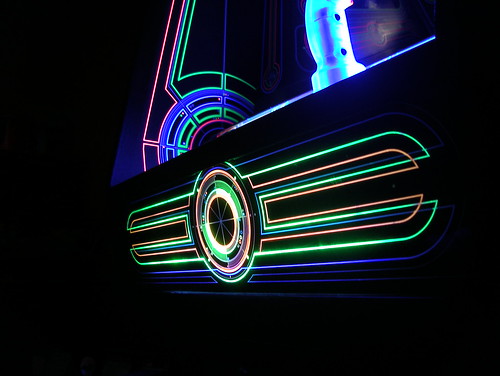
Highlighted Tron lower plastic

Comparison photo!
Also note the fancy new GroovyGameGear reproduction handle.
Before and After

Restoring Tron – Fin.

I’m done. Done done done.

Restored Tron

Okay, there are still a few things I plan to do, like add lights to the coin door inserts and replace the coin mechs for token use, but Tron is basically complete.

Restored Tron, lit

And for comparison purposes, here’s the cabinet back in the beginning of August:

Original Tron

For the full restoration from the beginning, start here.

Time to clean up the garage, enjoy the last couple weeks of vacation, and figure out what my next project cab is gonna be (I dunno if I have the constitution to dig into Cyberball just yet).

Restoring Tron – Capping the Monitor

Replacing the capacitors on the Wells 4900 was fairly easy, and actually kinda fun. It was my first experience soldering on a board, but I managed to complete the capping without issue, thanks in no small part to a couple instructional videos on Youtube. Thank you, Internet, I really do love you.

 =4900 Cap kit

These boards can take some abuse. Check out this creative bit of repair by a previous owner:

creative monitor board repair

I covered that exposed bit of wire near the top with electrical tape and let it be. Everything works fine for now, but I’m waiting for it to explode violently or something. Some day I’ll replace it just for the peace of mind.

Restoring Tron – Side Art

Side art application was similar to the previous pieces, just a whole lot bigger and a little bit scarier. The inner art required a bit more work, as it’s not cut by the printer, so I had to trim it to fit around the shape of the cabinet structure. Some restorers will build paper templates for this part and then cut the artwork before placement, but I eyeballed it and carefully trimmed as I went.

Tron restoration side art

Next I stripped down and cleaned up the light fixtures, painted the reflectors white, and replaced the starters. Note the yellow zipties I used with the wiring. I didn’t realize until later that they fluoresce, brightly. There’s also a shot of the new power cable and plug I wired up, as the original had exposed wires in several places. Glad I didn’t figure that out the hard way back before this project started.

Tron light fixtures

I also replaced the ni-cad battery on the power supply board. These batteries were put in place to retain high scores while the cabinet was powered off, a nice feature, but the particular battery choice was shortsighted on the part of the hardware designers. After a number of years, the ni-cad batteries often go bad, and when they do, they have a tendency to take the board out with ’em, leaking acid and corroding the pcb in the process.

Bad battery, bad.

Lithium battery conversion kits sell for a few bucks, and the soldering requirements are very basic (read the last two paragraphs here), so if you’ve got a Tron power supply board with its original battery, swap that thing out.

New battery, good.