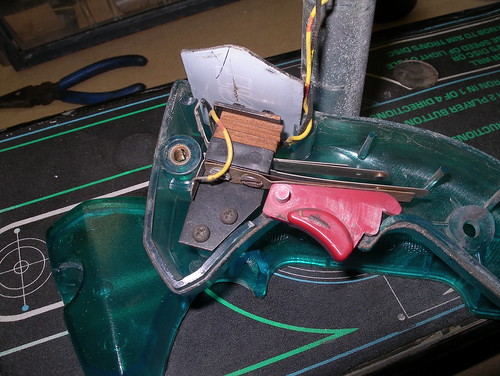
The security bolts on the joystick were gummed up and rusted, so I had to carefully dremel out the nubs on each bolt, a tense affair as original TRON joysticks are not cheap. Luckily, everything else came apart without issue.
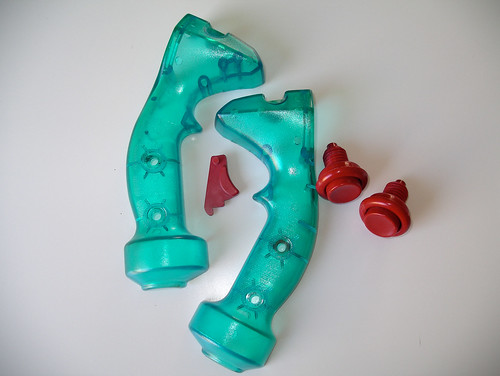
The control panel plastics cleaned up quite well. After soaking the handle, buttons, and spinner in a bucket of warm water and auto detergent for a couple hours, I scrubbed away the many many years of dirt and grime. Particularly notable was the wad of solidified gum that had to be scrapped off with a razor.
Here’s the before:
And after a good solid cleanin’:
I highly recommend Citristrip for removing stubborn and baked on control panel overlays. It has a consistency of sludge, doesn’t reek like most solvents, and didn’t feel like it was going to immediately burn my hands off if I got some on me (still, wear gloves, it’s powerful stuff). After a liberal coating with a cheap paintbrush, I let the panel sit overnight. The next morning, the old CPO and paint slid right off. Followed that with a wipe down of Goof Off to remove the last bits of adhesive, and then sanded the panel and applied a coat of primer. Here’s the CP immediately after using the Citristrip:

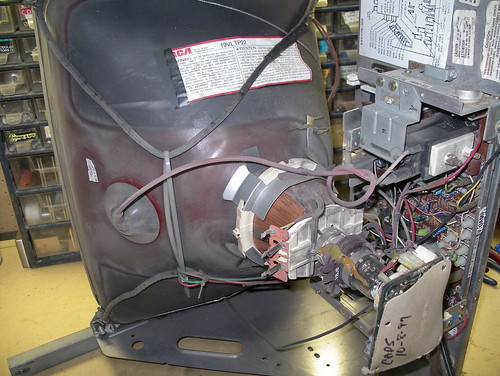
The monitor! A Well-Gardner K4900, it originally came out of a horizontal game, as there’s a slightly noticeable bit of burn-in, but not enough burn-in for me to identify the source. As the cardboard bit on the end of the neck states, someone replaced the caps in 1997, but I figure it’s a good idea to replace them now again anyway while I’ve got the monitor out of the cabinet.
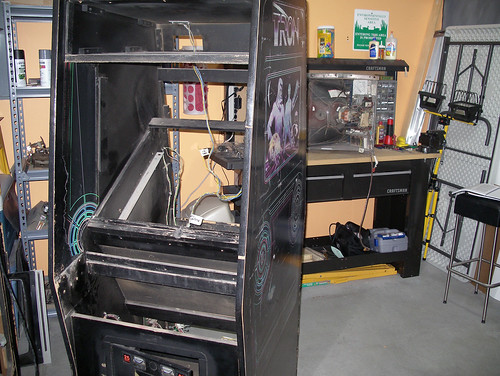
An arcade cabinet is deceptively simple. It’s like a big model, really. As long as you can get ahold of a parts list and schematics, you can put one of these together. Still, label everything. If you’re not sure, label it. Or even if you are sure, label it.
Parts order update:
- Phoenix Arcade reproduction TRON art
(inner art, marquee, shroud art, CPO, spinner decal, and joystick insert) - CP and joystick assembly nuts ‘n bolts kit (thanks for the lead, Jeff!)
- 18inch fluorescent light fixture for upper rear cabinet
- starters for the 3 original fixtures
- Various sundries for stripping, painting, and repair
(Bondo, putty knives, satin black spraypaint for metal bits, etc)
The next parts update will be the big one, as I’m preparing to write up orders from Bob Roberts and Arcadeshop now.
Dood, this is so fkn cool. I cant wait ’til you finish this so I can home invade you and make off with this gem. I know where you live…
Do you have any bolt kits left for sale?
You may want to ask the guy that was originally selling them (see the link in the writeup above), I’m just a consumer. :]
thanks for lead, the place is a treasure trove. LONG LIVE TRON!